
User Guide
How to start with CEOsofts ERP
Step-by-step guide: sign up, set up the company, then run sales and purchasing end-to-end — plus users, stock, accounting, and HR.
What is CEOsofts
CEOsofts is a cloud ERP for Thai SMEs — sales, stock, accounting, and payroll in one system.
- Every pack includes all modules.
- Choose hosting: subdomain on our cloud, your own domain on our cloud, or private lifetime install.
- Trial is about 180 days (see current offer on the pricing page).
1. Sign up for online accounting
Goal: create a company workspace and an admin account so you can use CEOsofts online.
Before you sign up
- Prepare a company name and an admin email you can access.
- If you want a subdomain, pick a short English name (letters/numbers only), e.g. myco.
- If you want your own domain, you will need DNS access later — you can still start and verify DNS afterward.
- Use www.ceosofts.com when signing up (same site you are on now).
Sign up steps
- Open Pricing, pick a plan (Subdomain Cloud or Custom Domain Cloud), then press Get Started.
- Wizard steps: Plan → Company → Account → Workspace → Confirm.
- Company: company name (required), phone (optional).
- Account: admin name, email, password — this user becomes Super Admin.
- Workspace: pick subdomain (e.g. myco.ceosofts.com) or your own domain, depending on the plan.
- Accept Terms / Privacy (PDPA), then start the trial.
- You will land in the dashboard (or a DNS guide if you chose a custom domain — you can skip and verify later).
What the system creates for you
- Chart of Accounts, units, item categories, warehouses, tax GL links.
- Sample departments / positions and expense categories for HR and expenses.
- Not created yet: customers, vendors, items, stock quantities, or accounting periods — you add these next.
2. Company setup
Do this before posting real documents — tax and periods affect invoices and journals.
Company Settings
Admin → Company Settings (ตั้งค่าบริษัท)
- Fill company name, legal entity type, email, phone, address, and logo.
- Enter Tax ID (13 digits) and tax branch (6 digits; head office often 000000).
- Set currency (usually THB), fiscal year start month, and rounding.
- VAT: registered or not, VAT rate (default 7%), and whether menu prices include VAT.
- Optional: display name / brand color / support email for white-label feel.
Accounting periods
Admin → Accounting Period (งวดบัญชี) — create and open monthly periods before posting journals and many documents.
Check seeded masters
- Accounting → Chart of Accounts — adjust if your chart differs.
- Stock → Units / Item Categories / Warehouses — already seeded; add more if needed.
- Admin → Departments / Positions — for HR later.
3. Sales quotation flow
You cannot start with a quotation alone. Create masters first, then follow the document chain.
Start here (prerequisites)
- Stock → Items — create products/services (link unit + category). Service items may not need warehouse stock.
- For stocked goods: put quantity into a warehouse via Stock → Add Inventory Receipt, or later via Goods Receipt from a purchase.
- Sales → Customers — create the customer you will quote.
- Confirm Company VAT settings and an open accounting period.
Document chain
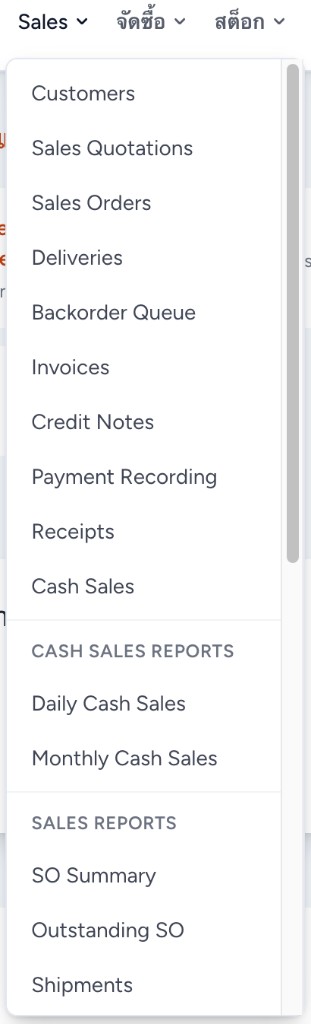
- Sales → Sales Quotations — create QT with customer, dates, lines (item, qty, price, tax/discount). Status: draft → send → accept.
- When accepted: Convert to Sales Order. QT becomes converted.
- Sales → Sales Orders — Approve (Confirmed). Complete deposit steps if your QT/SO requires a deposit.
- Sales → Deliveries — create from the SO, set warehouse on stock lines, Ready → Ship.
- Sales → Invoices — create from delivery and/or SO, then Post.
- Sales → Payment Recording and/or Receipts — record and post customer payment against the invoice.
- Optional: Credit Notes, Backorder Queue for unmet quantities.
Cash Sales (shortcut)
For made-to-order food, coffee, and similar counter sales, use Sales → Cash Sales (see section 7) — no QT → SO required.
Typical status path
QT: draft → sent → accepted → converted · SO: draft → approved · Delivery: draft → ready → shipped · Invoice: draft → posted → paid · Payment: draft → posted
4. Purchase order flow
Same idea as sales: masters first, then documents. Stock items must exist before you order and receive them.
Start here (prerequisites)
- Stock → Items — create the items you will buy (same catalog as sales when you resell).
- Stock → Warehouses — know which warehouse will receive goods (คลังหลัก is seeded).
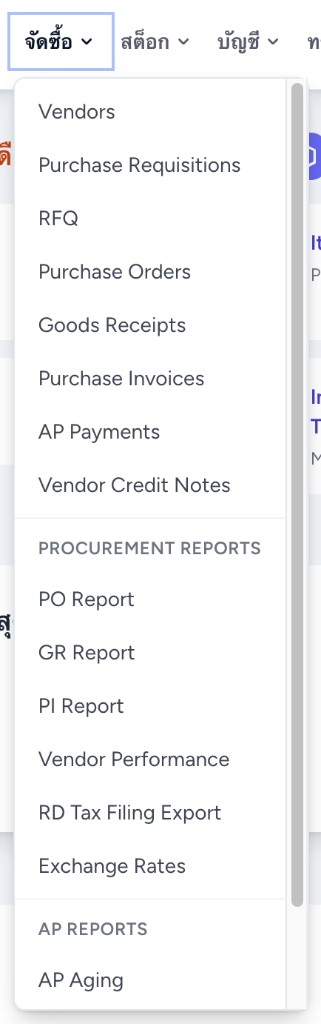
- จัดซื้อ → Vendors — create the supplier.
- Optional upstream: Purchase Requisitions and/or RFQ, then convert to PO.
Document chain
- จัดซื้อ → Purchase Orders — create PO (vendor, dates, payment cash/credit, lines). Or convert from PR/RFQ.
- Submit → Approve (manager). PO moves toward approved.
- จัดซื้อ → Goods Receipts — receive against the PO into a warehouse, then Approve so stock increases.
- จัดซื้อ → Purchase Invoices (AP) — create from GR and/or PO, then Post.
- จัดซื้อ → AP Payments — record payment (cash / transfer / cheque / card; deposit or balance as needed).
- Optional: Vendor Credit Notes; reports such as PO/GR/PI Report and AP Aging.
Typical status path
PO: draft → pending approval → approved → received/billed · GR: pending → approved · Purchase Invoice: draft → posted → paid
5. Users & permissions
The signup admin is Super Admin. Add staff accounts and assign roles so each person only sees what they need.
Create a user
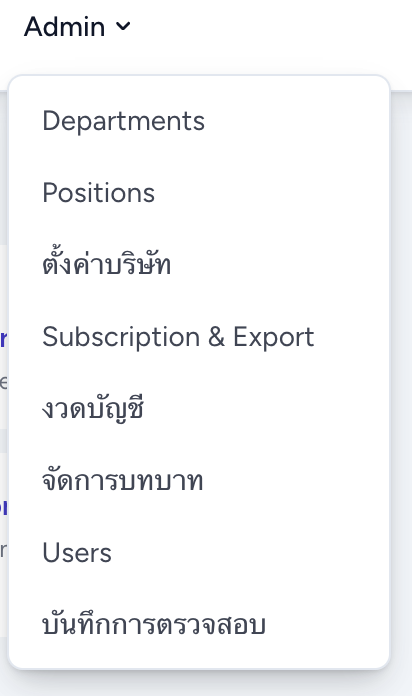
- Admin → Users — Create: name, email, password (or send invite).
- Assign at least one role, then save. You can invite, force password reset, deactivate, or revoke sessions later.
Roles (สิทธิ์)
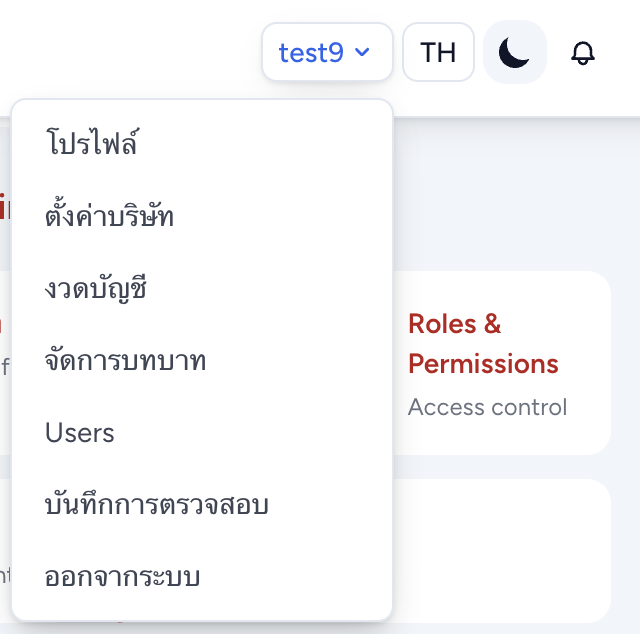
Admin → Role Management (จัดการบทบาท) — edit a role and tick permissions (view/create/update/delete/post per module).
- Super Admin — Full company access (signup owner).
- Admin — Settings, users, inventory, HR, and many admin tools.
- Accountant — Journals, invoices, customers, payments, bank, reports.
- Manager — Mostly view + approvals (e.g. expenses, leave).
- User — Limited view / self-service style access.
Tip: create the role mix first, then add users — easier than fixing permissions one by one.
6. Other modules
After sales and purchasing work, expand into stock ops, books, bank, and HR.
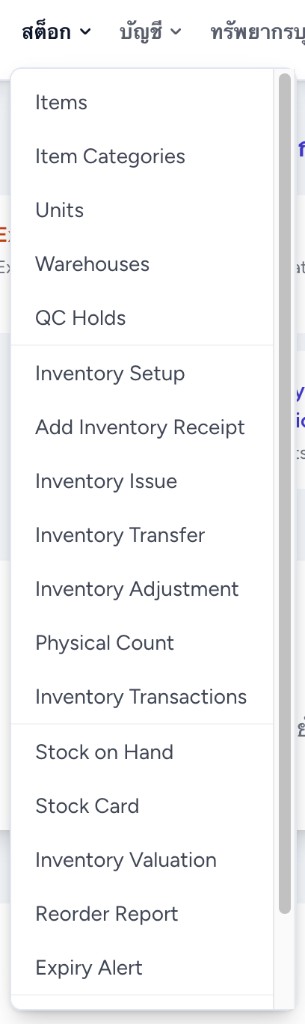
Inventory (สต็อก)
- Masters: Items, Categories, Units, Warehouses.
- Daily ops: Inventory Receipt, Issue, Transfer, Adjustment, Physical Count, Transactions.
- Reports: Stock on Hand, Stock Card, Valuation, Reorder, Expiry Alert.
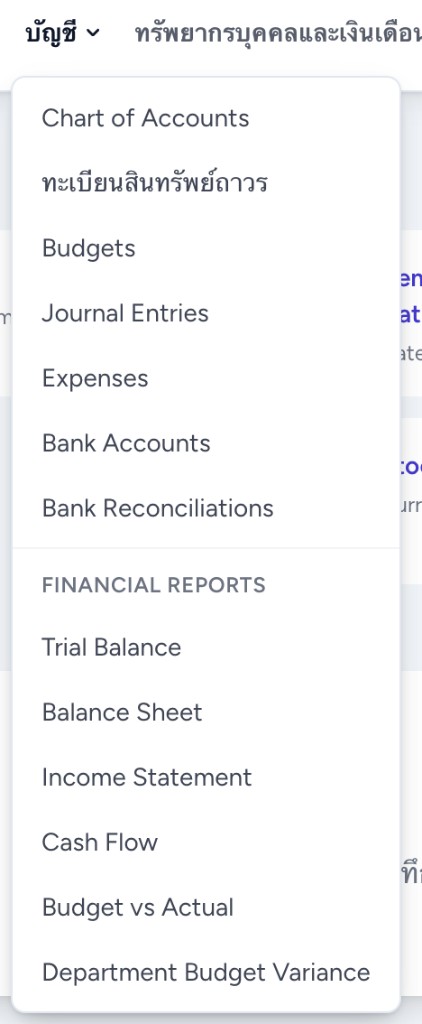
Accounting (บัญชี)
- Chart of Accounts, Journal Entries (draft → post → reverse), Budgets, Expenses, Fixed Asset Register.
- Bank Accounts + Bank Reconciliations — import statement, match, finalize.
- Reports: Trial Balance, Balance Sheet, Income Statement, Cash Flow, Budget vs Actual.
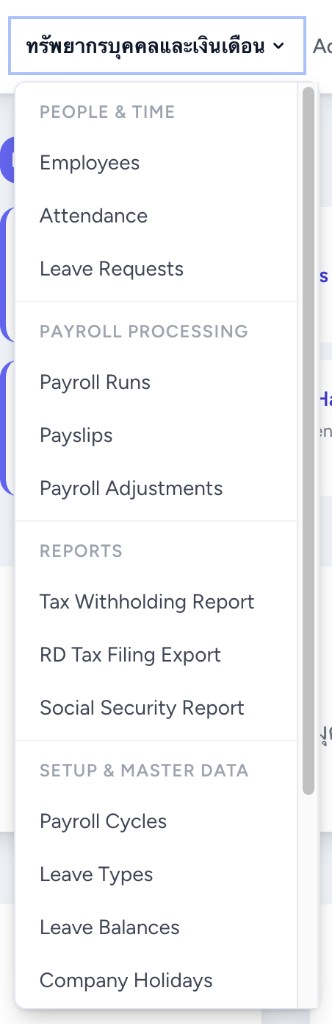
HR & Payroll
- People: Employees, Attendance, Leave Requests.
- Payroll: Payroll Runs, Payslips, Adjustments; tax / social security reports.
- Setup: Payroll Cycles, Leave Types/Balances, Company Holidays.
- Link a user to an employee if they need My HR self-service.
Admin & audit
- Departments, Positions, Company Settings, Subscription & Export, Accounting Periods.
- Roles, Users, Audit Log (บันทึกการตรวจสอบ) for system activity.
Suggested first-week order
- Sign up → Company Settings + Accounting Periods.
- Items + opening stock; Customers; Vendors.
- Try one full sales chain and one full purchase chain.
- Add Users with Accountant / Manager roles.
- Then journals, bank reconciliation, and HR as needed.
- If you sell food/drinks at the counter, set up Cash Menu and try Cash Sales (section 7).
7. Cash sales (food & drinks)
Use Cash Sales for quick counter sales — e.g. made-to-order food, coffee, drinks, snacks. It is a POS-style screen: tap menu items into a cart and post the sale immediately. You do not need Quotation → Sales Order → Delivery.
When to use Cash Sales
- Restaurants / cafés: อาหารตามสั่ง, กาแฟ, เครื่องดื่ม, ของว่าง
- Retail counter or services sold and paid on the spot
- Not for credit invoices or multi-step B2B delivery — use the sales quotation flow (section 3) instead
Start here (menu setup)
- Confirm Company Settings (VAT registered or not, and whether prices include VAT) — Cash Sales follows those settings.
- Sales → Cash Sales → Cash Menu Setup (or open Cash Menu Setup from the Cash Sales page).
- Add categories first — e.g. Food, Drinks, Coffee, Snacks. Use display order so important groups appear first.
- Add menu items under each category: name, price, icon (coffee / food / drink / …), and display order.
- Inventory link (optional): link a menu item to a Stock → Item only if you want stock deducted when sold (e.g. bottled drink). Leave blank for made-to-order food or coffee that you do not track per cup.
Sell at the counter
- Sales → Cash Sales — pick a category, tap items into the cart, adjust qty if needed.
- Check totals (VAT shown according to company settings), then post / complete the sale.
- Repeat for the next customer. Void a sale only when your role allows and the sale should be cancelled.
Reports
- Sales → Daily Cash Sales — day summary
- Sales → Monthly Cash Sales — month summary
Tips for food & coffee shops
- Keep menu names short and clear on the POS buttons (e.g. กาแฟร้อน, ข้าวผัดไก่).
- Group by how staff sell: Drinks vs Food, not by accounting accounts.
- Track stock only for items that matter (bottles, packaged goods). Skip stock link for cooked-to-order dishes.
- Give cashiers a role with cash_sale permissions; managers need report access for Daily/Monthly reports.
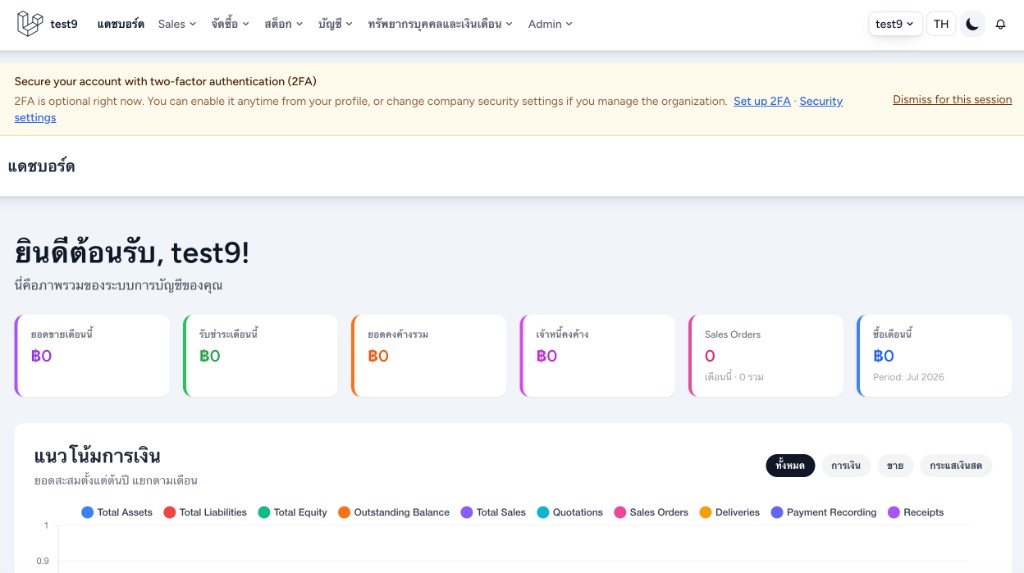
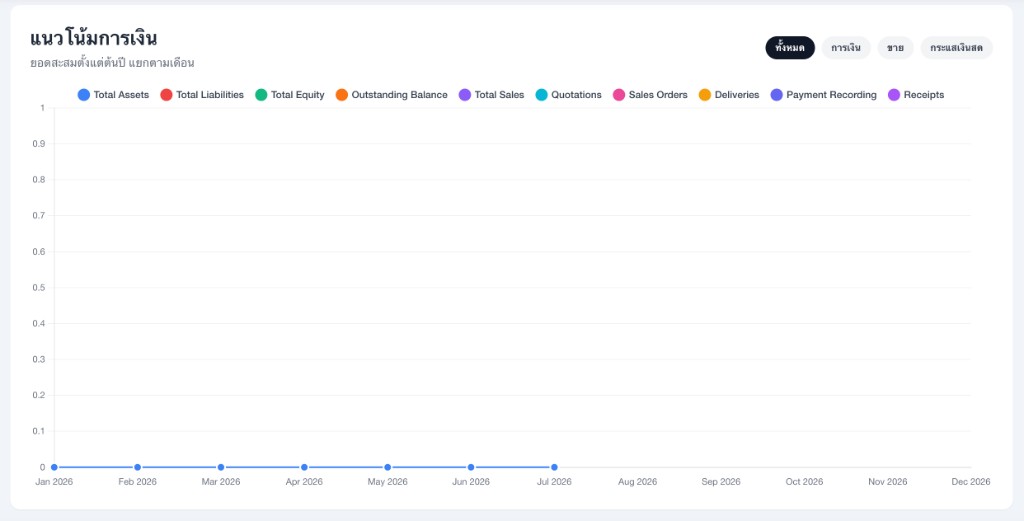
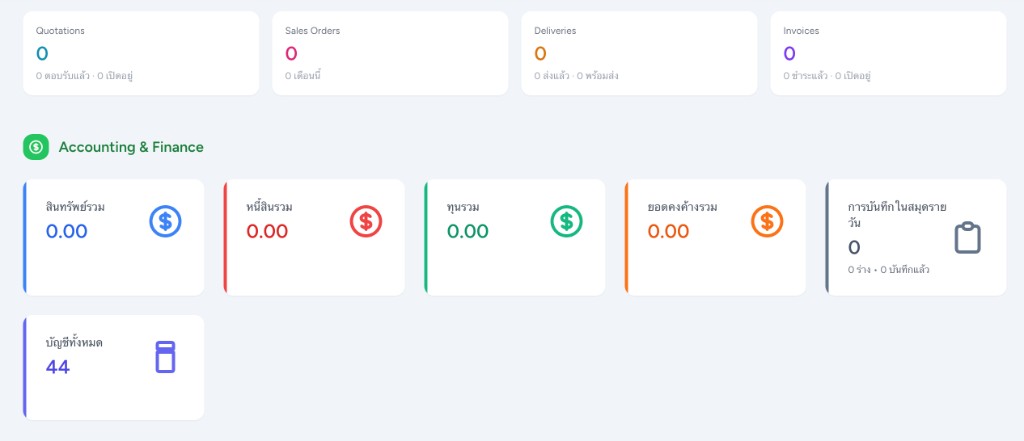
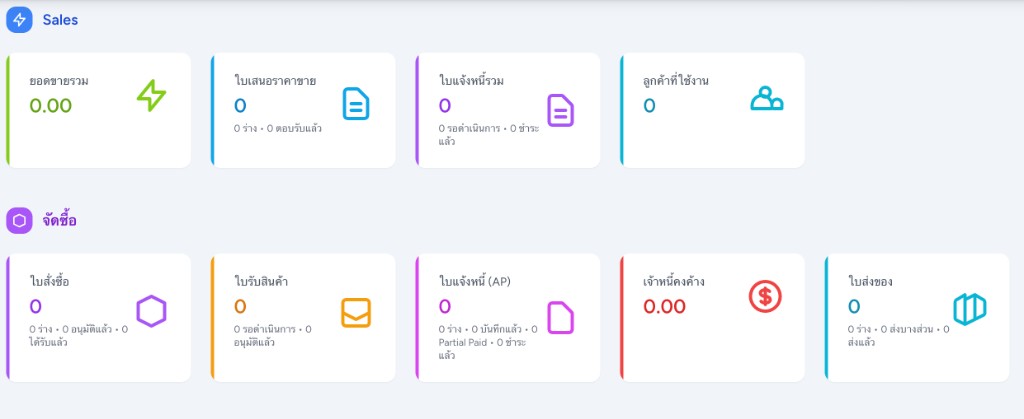
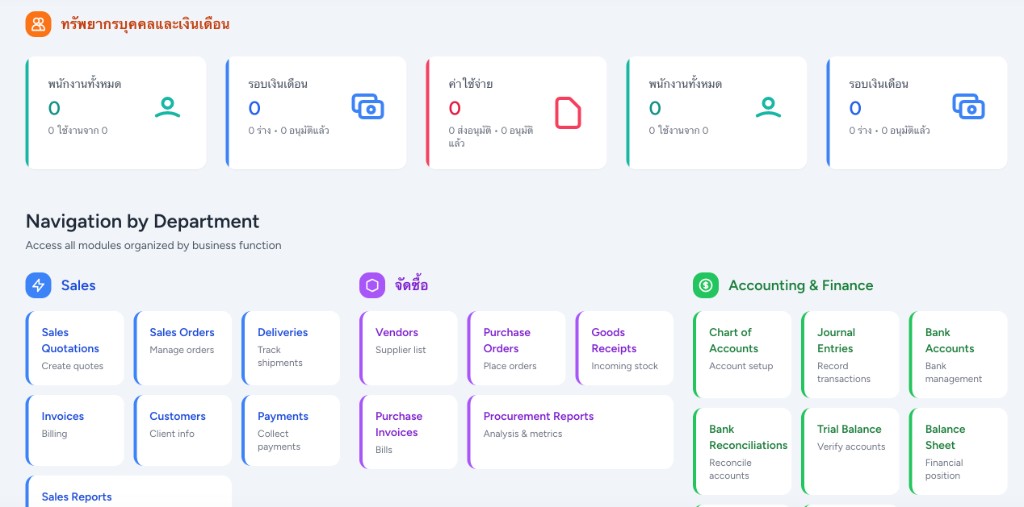
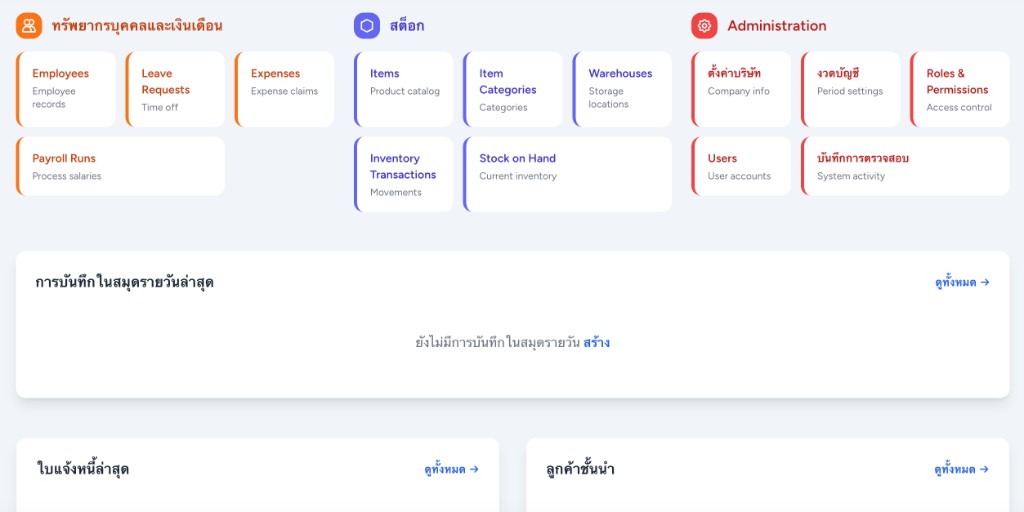
Dashboard & menus
After login the dashboard shows KPIs, financial trends, and shortcuts. Use the top menu for each module.
Tips
- Subdomain URLs like company.ceosofts.com need wildcard DNS from the host — until then, use www.ceosofts.com/login.
- Custom domain needs TXT + CNAME verification; you can skip and finish later in Settings → Subscription.
- Change default passwords for any seeded demo/platform accounts on production.
- Need help? Open Contact for email and phone, or use the footer links.
More screenshots (pricing, register, sales documents) will appear here as they are added under public/images/guides/.